
Wedding Photography Lighting (Part 1 - Natural Light Photography)
I am a Professional Wedding Photographer in Adelaide, SA. The purpose of this post is to answer our Facebook friend Wang Brooks's question: "I wish that if you can share information about light and visual angle." Part 1 and 2 will focus on the Light aspect of the question. Part 3 work on the Angle on how I see things. wedding photography lighting
Personal Disclaimer: These blog posts are what I do and how I feel about Wedding Photography Lighting. It is subjective and there is no right and wrong way of doing it.
Part 1 - Natural Light Photography
Part 2 - Wedding Photography Lighting (Using Flash)
Part 3 - Working with Angle (TBA)
Photographing in a wedding is not all about MY PHOTOGRAPHY that takes priority over everything. I do not centre myself as "Scott is the photographer and he wants this and that". I have to meet schedule, live to my expectation (to perform), to ensure that I am able to produce the best with what is going on (in terms of wedding photography lighting).
Now, Light!
Wedding Photography Lighting can be as simple as Natural light to complicating multiple Flash lights. I use a combination of natural and flash lighting in different situations.
Natural Light Photography
Why natural light? It's easy, less equipment (flash) to buy and carry quick. Often a photojournalistic way of capturing moments without being discovered.
When is natural light not suitable? Here's some reasons I can think of.
- Ambient lights is brighter than subject, this means that you have a darker subject in a well exposed photo.
- Some dark wedding venues when you can't even see clearly.
- When you want to use artificial light to create a more dramatic photo.
- Save you some $ by not buying more lights.
- Fill flash to clean shadows - portrait. Especially in afternoon sun.
- You need to freeze fast subject in motion.

Above is an example of using natural light during pretty dim wedding reception venue in Windy Point, South Australia. Light source is the heater light just above the bride.
1:Gears: Often not a must, but this helps a lot in low light condition wedding reception venue. You might just have to use a camera body with good high ISO capability paired with a "fast" lens. Lens that can go wide like f/1.4 such as a prime lens. Here is a link to my gear list. Here's an article on what lens should you use for wedding photography. I will try to update my gear list to include my wedding photography lighting gears use.
2: The first light source and often the main light is the Sun. Most photographers will begin their journey as a natural light photographer who don't supplement additional lights in a wedding. I am one. Know where the sun is coming from.
3: Observe the Shadows. This is the key. Apply to indoor and outdoor. When there is light, there will be shadow. Watch the shadow on the face. In an outdoor portrait for example, your couple might be under the tree, watch how the tree branches are creating shadows on their face. If so, move them around or use fill flash. When I start at my groom or bride's place for their prep, I like to walk around the house and observe the lights. Is there direct sun light coming in from the window/sliding door?
4: Make use of Any Available Light such as the videographer's video light. This can be a good substitute for off camera flash light. Some photographers dislike to work with videographers video light but i love it. Likewise, in a reception. I love to use the DJ lights as well. This creates a really good ambient lights even if it's bright green light on someone's face. It's the mood. Lights from bedside lamp, torches etc can be useful too. Just look around.
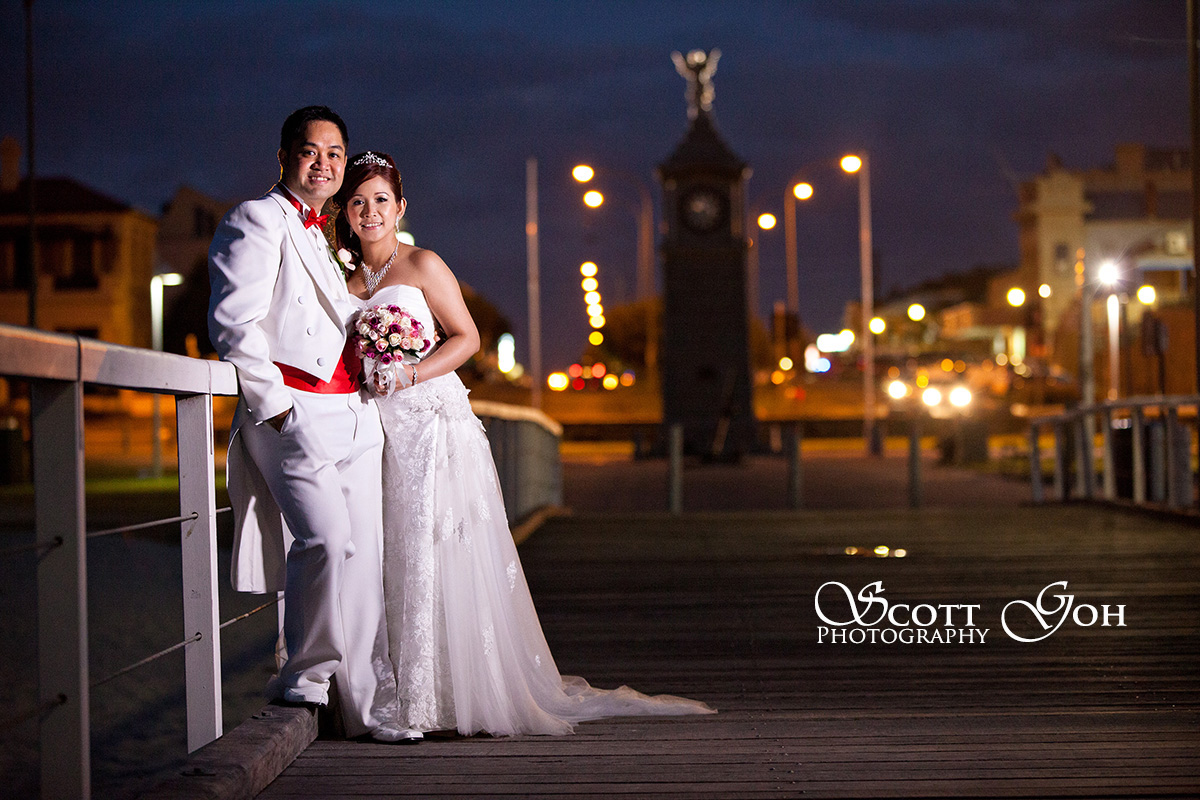
Image Above: Videographer is standing on my right. I am borrowing his light in this portrait. Way too easy! wedding photography lighting
5: Mobile phone light, YES! Use it! You do have a light source with you everywhere you go. I use my iPhone light to lit up the details when i need them.
6: Should I overexpose or underexpose? In general, I expose for the skin of my bride and groom. Take the photos in RAW format and this save you lots of overexpose or underexpose of the skin. wedding photography lighting
7: Avoid Afternoon Sun. As a natural light photographer, if you are not using any flash for fill, try to avoid afternoon sun as it will cause harsh shadow just below the eyes.
8: Do not to place people facing the sun. Pretty self explanatory.
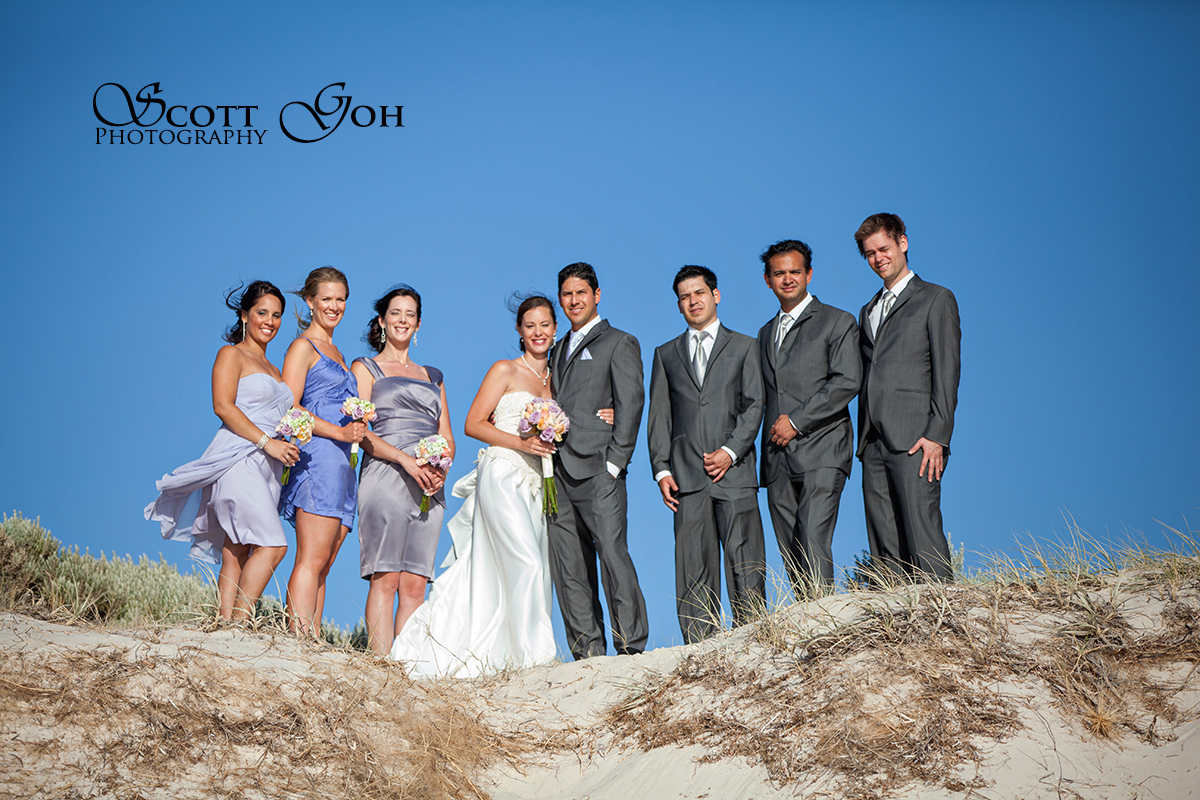
Image Above: I took the photo of the bridal party facing the sun. Why? The wind from the sea will not mess up their hair when they are facing the sea & sun. I did turn around and take another photos of them back-face the sun/sea. Their eyes are better as they are not looking at the harsh sun but their hairs are flying in front of their face.
Thank you for reading our article on wedding photography lighting and hope you will find these wedding photography lighting tips useful as a natural light photographer.
Kindly support us by giving our Facebook page a LIKE and Share this article. Let me know if you have any questions.
Scott Goh Photography
wedding photography lighting